costco frozen chicken recipes
Costco Frozen Chicken Recipes
Costco frozen chicken is a great option for busy families who want quick, healthy meals. These vacuum-sealed chicken breasts can be cooked straight from frozen, which saves you time in the kitchen. Whether you prefer baking, air frying, or slow cooking, these chicken breasts are versatile and packed with protein. In the following sections, you’ll discover some easy recipes and tips to make the most of this convenient ingredient. Let’s start cooking!
Why You’ll Love This Recipe
If you’re looking for a hassle-free meal option, you’ll love using Costco’s frozen chicken breasts. These individually packaged, vacuum-sealed portions make meal prep easy. You can cook them straight from frozen, saving you time and effort. Each serving is high in protein, low in fat, and gluten-free, making it a healthy choice. Plus, the mild seasoning allows you to add your favorite flavors or sauces. With various cooking methods available, like baking, air frying, or slow cooking, you can prepare delicious meals in no time. At just $29.99 for a 2-kilogram bag, it’s an economical option that offers versatility and convenience for any busy kitchen. Best of all, the best before date is approximately 10 months from purchase, ensuring you have plenty of time to enjoy your meals. Enjoy quick, nutritious meals with ease!
History
Costco’s frozen chicken offerings have an interesting history that reflects its commitment to quality and convenience. In the 1980s, Costco started selling rotisserie chickens, which set the stage for its frozen chicken products. To guarantee high standards, the company developed its own poultry facility, allowing better control over production. The launch of the Kirkland Signature brand further emphasized their dedication to quality. Today, you can find a variety of frozen chicken options, including breasts, thighs, and wings, designed for easy preparation. Costco also focuses on ingredient transparency, providing detailed labels that inform you about what’s in your food. This commitment to animal welfare and quality shows how Costco’s efforts in quality control and efficient supply chain management have shaped its frozen chicken product line.
Recipe
When you’re looking for a quick and nutritious meal, Kirkland Signature Frozen Chicken Breasts are an excellent choice. These individually vacuum-sealed chicken breasts allow for easy thawing and cooking straight from frozen, making them a convenient option for busy weeknights. With a long shelf life and the flexibility to season them according to your taste, you can whip up a delicious dish without a lot of hassle. Additionally, each breast serves 3-4 meals for single servings, making it a practical option for meal planning.
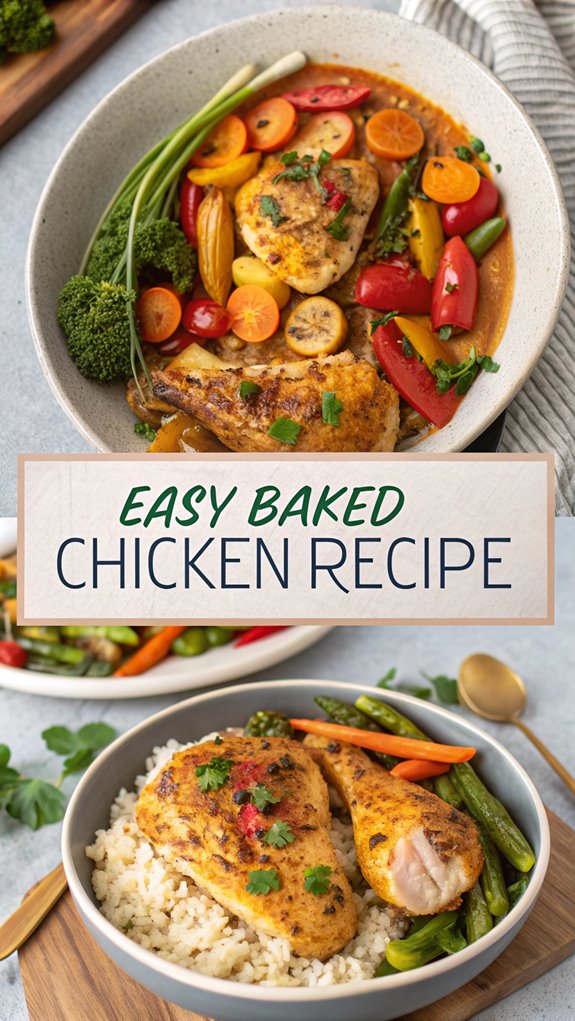
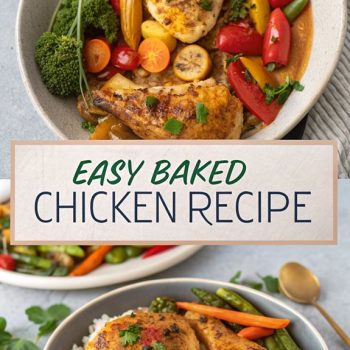
This recipe highlights a simple yet flavorful baked chicken breast dish that’s perfect for pairing with your favorite sides. By seasoning the chicken breasts and baking them in the oven, you can achieve juicy, tender chicken that’s both healthy and satisfying. Whether you’re serving it for a family dinner or meal prepping for the week, this recipe is sure to become a staple in your kitchen.
Ingredients:
– Kirkland Signature Frozen Chicken Breasts
– Olive oil
– Salt
– Black pepper
– Garlic powder
– Paprika
– Optional: dried herbs (like thyme or oregano) for added flavor
Cooking Instructions:
1. Preheat your oven to 400 degrees F (200 degrees C).
2. Take the frozen chicken breasts out of the packaging and place them in a large baking dish. Make sure the breasts are arranged in a single layer for even cooking.
3. Cover the baking dish with aluminum foil and place it in the preheated oven. Bake for 20 minutes to allow the chicken to thaw and start cooking.
4. After 20 minutes, remove the foil and season the chicken breasts with olive oil, salt, black pepper, garlic powder, and paprika. Feel free to add any additional herbs you prefer.
5. Return the uncovered baking dish to the oven and bake for an additional 15-20 minutes, or until the internal temperature of the chicken reaches 165 degrees F (75 degrees C).
6. Once cooked, remove the chicken from the oven and let it rest for a few minutes before slicing or serving.
For extra tips, always verify that the chicken is cooked to the proper internal temperature for safety and quality.
If you’re looking to add more flavor, consider marinating the chicken in your favorite sauce or spices after thawing it in the refrigerator. Additionally, feel free to experiment with different seasoning blends to customize the dish to your taste preferences!
Final Thoughts
Although you may have already discovered some great recipes using Costco’s frozen chicken breasts, it’s important to contemplate their overall value and convenience.
These individually vacuum-sealed breasts make meal prep easy, allowing you to cook only what you need. The chicken is clean, made with just basic ingredients like water and kosher salt, ensuring you know what you’re eating.
Nutritionally, you get a high protein content with low calories and fat, making it a healthy choice. While cooking from frozen can yield moist and tender results, be mindful of texture.
At $2.77 per pound, it’s a cost-effective option, especially when you consider the long shelf life. Overall, it’s a practical and nutritious addition to your kitchen.
FAQ
You might’ve questions about using Costco’s frozen chicken breasts, especially if you’re new to cooking with them.
First, these Kirkland Signature chicken breasts weigh 6.5 pounds and come in packs of nine.
For cooking, you can bake, air fry, boil, or use a crockpot. If you choose to bake, preheat your oven to 400°F and cover the chicken for the first 20 minutes. Thawing in the refrigerator overnight ensures safe and even defrosting, giving you the best texture and flavor.
Air frying works well too; just preheat to 360°F and cook for about 10 minutes.
Don’t forget to let the chicken rest for 5-10 minutes after cooking to keep it juicy.
Each breast offers 22 grams of protein, making it a healthy option for meals.
Costco Frozen Chicken Recipes
Ingredients
- Ingredients:
- - Kirkland Signature Frozen Chicken Breasts
- - Olive oil
- - Salt
- - Black pepper
- - Garlic powder
- - Paprika
- - Optional: dried herbs like thyme or oregano for added flavor
Instructions
- Cooking Instructions:
- Preheat your oven to 400 degrees F (200 degrees C).
- Take the frozen chicken breasts out of the packaging and place them in a large baking dish. Make sure the breasts are arranged in a single layer for even cooking.
- Cover the baking dish with aluminum foil and place it in the preheated oven. Bake for 20 minutes to allow the chicken to thaw and start cooking.
- After 20 minutes, remove the foil and season the chicken breasts with olive oil, salt, black pepper, garlic powder, and paprika. Feel free to add any additional herbs you prefer.
- Return the uncovered baking dish to the oven and bake for an additional 15-20 minutes, or until the internal temperature of the chicken reaches 165 degrees F (75 degrees C).
- Once cooked, remove the chicken from the oven and let it rest for a few minutes before slicing or serving.
- For extra tips, always verify that the chicken is cooked to the proper internal temperature for safety and quality.
- If you're looking to add more flavor, consider marinating the chicken in your favorite sauce or spices after thawing it in the refrigerator. Additionally, feel free to experiment with different seasoning blends to customize the dish to your taste preferences!